
I want to share the way I was connecting to the MIT's CBA videoconferencing system because:
This is my setup. Remember I am using Ubuntu. For Mac OS X or Windows operating systems all of these might be different or even not work at all.
After using several apps like Ekiga I am finally using Linphone. Ekiga crashed several times in my computer. Sometimes it didn't even show me the remote video, or my local video. I found it quite unstable, but Neil keeps recommending it in a Chromebook environment. Installing the latest release of Linphone in Ubuntu is easy typing in a terminal window:
sudo add-apt-repository ppa:linphone/release
sudo apt-get update
sudo apt-get install linphone
After installation just type linphone in a terminal window to execute it.
The image shown below is the main window that appears after executing Linphone. In here you can type a SIP address and press the call button to connect, but it is preferable that you create a new contact, since you will be calling the videoconferencing system several times:
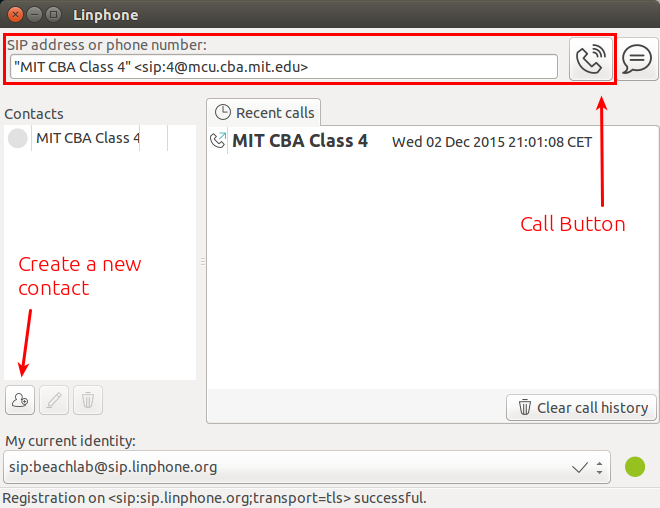
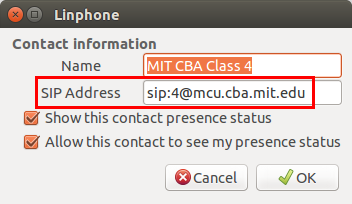
In the contact window create the following contacts. The address for the main menu screen in the MCU is sip:mcu.cba.mit.edu if you are connecting from a lab or sip:mcuc.cba.mit.edu (note the c) if you connecting as an individual. In the main menu you can select which room to join using the keypad (see later below). You can also create a direct access to class room 4 (the lectures channel) adding 4@ after sip:. This is very convenient since you can save time when reconnecting. Just remember that if you are connecting from a lab create sip:4@mcu.cba.mit.edu, if you are connecting as an individual use sip:4@mcuc.cba.mit.edu (note the c) instead.
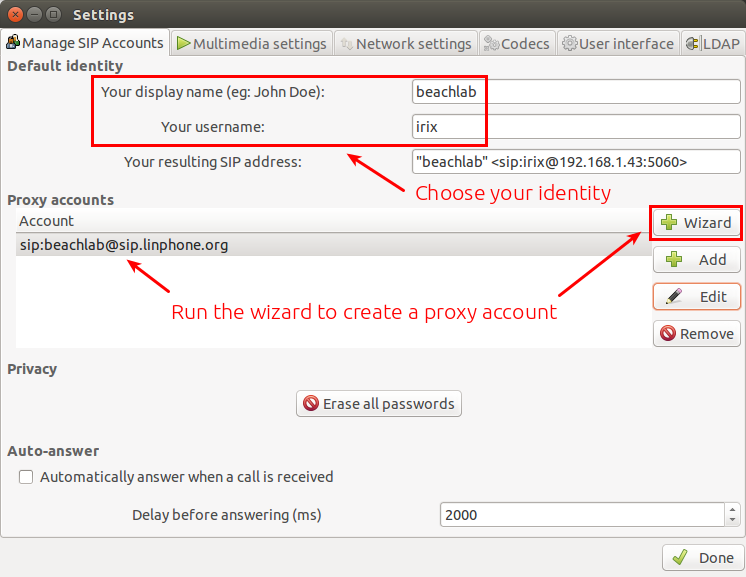
It is now time to configure the connection. With the main window focused go to Options/Preferences in the menu bar. A new window with several tabs will appear. The first one is the Manage SIP Accounts tab. In this tab it is strongly recommended that you run the wizard to create a proxy account on linphone.org, because many routers have blocked ports that you need to connect. You can also choose here the name that will be shown to other participants.
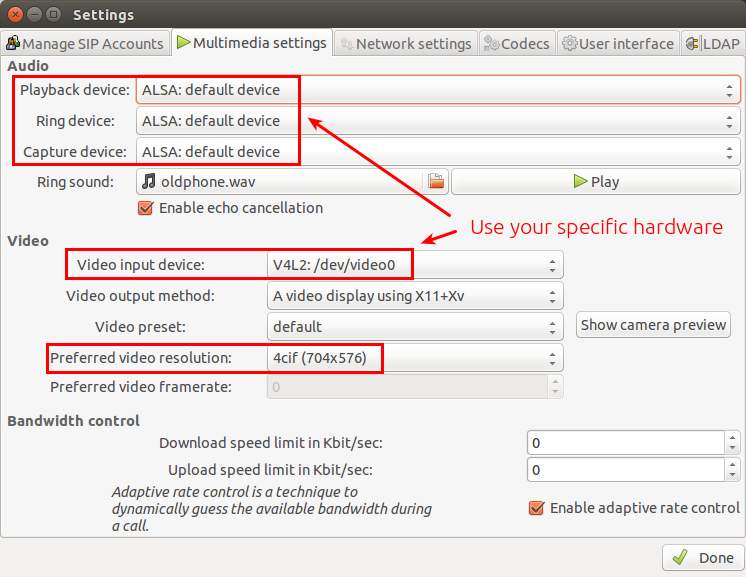
In the Multimedia settings tab select the specific hardware that you might have like the Logitech C920 Camera or the Echo Cancelling microphone from the inventory, if you have them. In case your microphone already has a built in echo cancellation disable the Enable echo cancellation option.
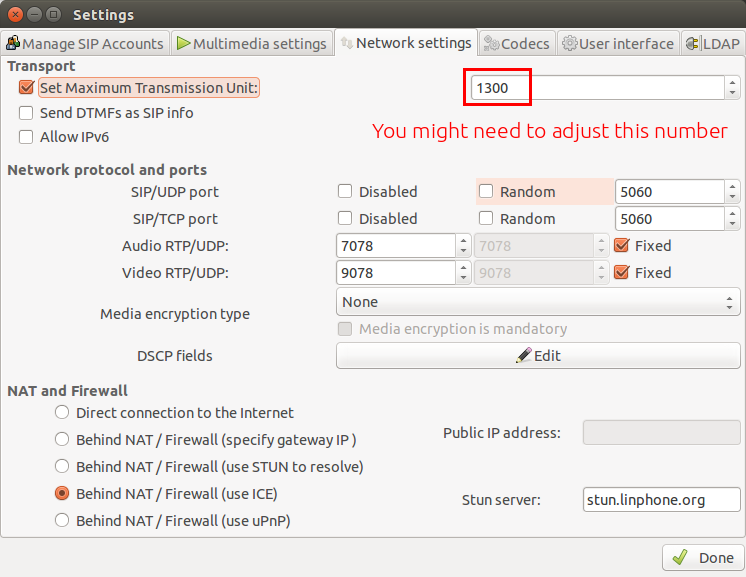
In the Network settings tab check Set Maximum Transmission Unit acording to your upload speed. If you have a 1 Mbps upstream connection it would be safe to leave this a 700:
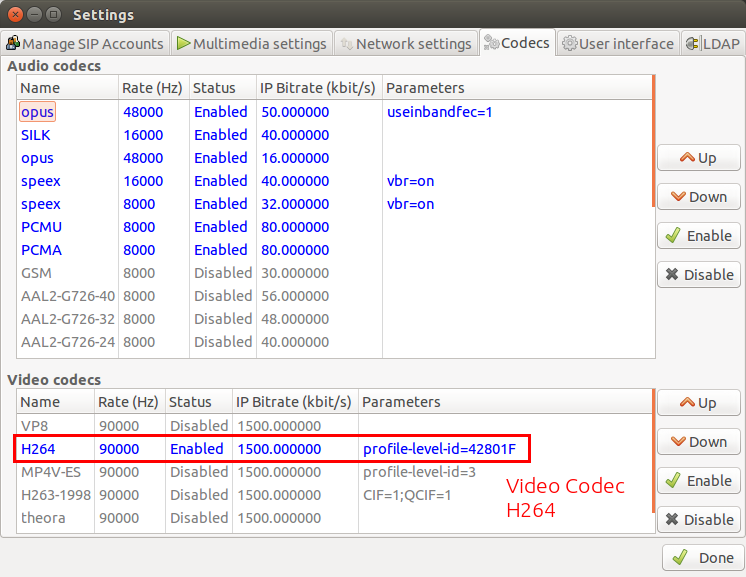
Finally in the Codecs tab, make sure that you have enabled the H264 codec.
Connect to the class clicking in your Class 4 contact or typing in the address bar:
sip:4@mcu.cba.mit.edu
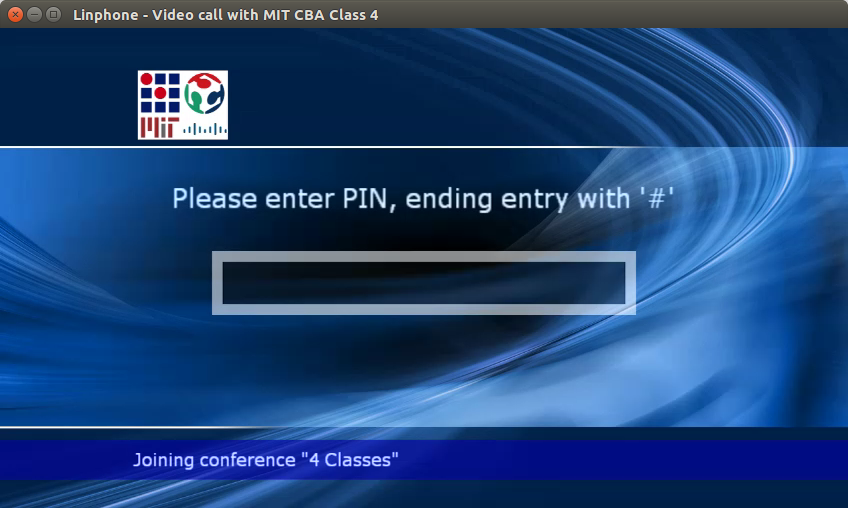
And enter the PIN number followed by the pound key #, not using your keyboard but the keypad window (to show the keypad window go to Options/Show Keypad in the menu bar). Please do not ask me for the PIN number. This number will be given to you by your local or remote tutor when you join the course. PINs for mcu (lab connection) and mcuc (individual connection) are different.
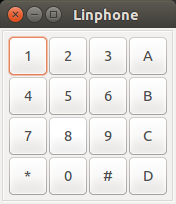
By default, when you enter the class room you are muted remotely. A good practice when you enter ther room is muting locally and then toggle between remote mute and remote unmute dialing *6 using the keypad.
Then you only have to unmute locally when you need to talk. Remember to mute locally right after you finish talking.
You can modify the layout using the keypad. Keys 2 and 8 will modify the layout while keys 4 and 6 will change the main participant (usually the biggest) in the layout.
